Wednesday
Apr172013
;)
Print out this handy image when you need to remember which way to turn your distributor or where your plug wires go.
Changing the vacuum advance on your Prestolite Distributor. (Note: More images to be added at end.)
From 1974-1977 AMC/Jeep used a unique and much disliked Prestolite breakerless ignition system on their six and eight cylinder engines. The Prestolite system was only used a short while until AMC moved to the better Motorcraft Duraspark system, but it did perform adequately on a stock engine and should not just be torn out at the first sign of trouble if it had been performing adequately up until that point.
As with all electronic breakerless distributor systems, time, heat, and lack of maintenance can cause problems. You have to remember that these parts are now almost 40 years old and have tens of thousands of miles on them so you should expect that they will wear out from time to time.
Luckily the Prestolite system is very simple. It has one wire that is hot both during start and run to provide power to the whole thing; that’s the only connection to the rest of the wiring harness. This does mean that unlike the later Duraspark there is no crank retard in the system, but neither did the Points system nor the popular GM HEI have a crank retard.
The power wire connects directly to the coil and from there to the ignition control box. The major weak point in the whole ignition is this connector between the control box and the rest of the wiring. Corrosion can get in there and disrupt operation.
I recommend that even in a working system this connection be unplugged and cleaned before being reassembled with some dialectic grease.
The control box seems neither more nor less prone to failure then many first generation electronic ignitions, and exhibits the same symptoms the others do during failure. It behaves similar to a bad coil.
The control box is more susceptible to heat then later designs are and so it should be mounted in the coolest place possible, and it generally is from the factory. If you suspect that it or the coil is bad and you don’t know the history of the parts then go ahead and replace them as a set.
One of the notable things about the Prestolite system is that it does not use an external resistor like other systems, providing full current to the coil at all times. Another rare item is that it uses a hall-effect sensor to trigger rather the more common magnetic inductance system. This means it is less adaptable to aftermarket ignition control boxes.
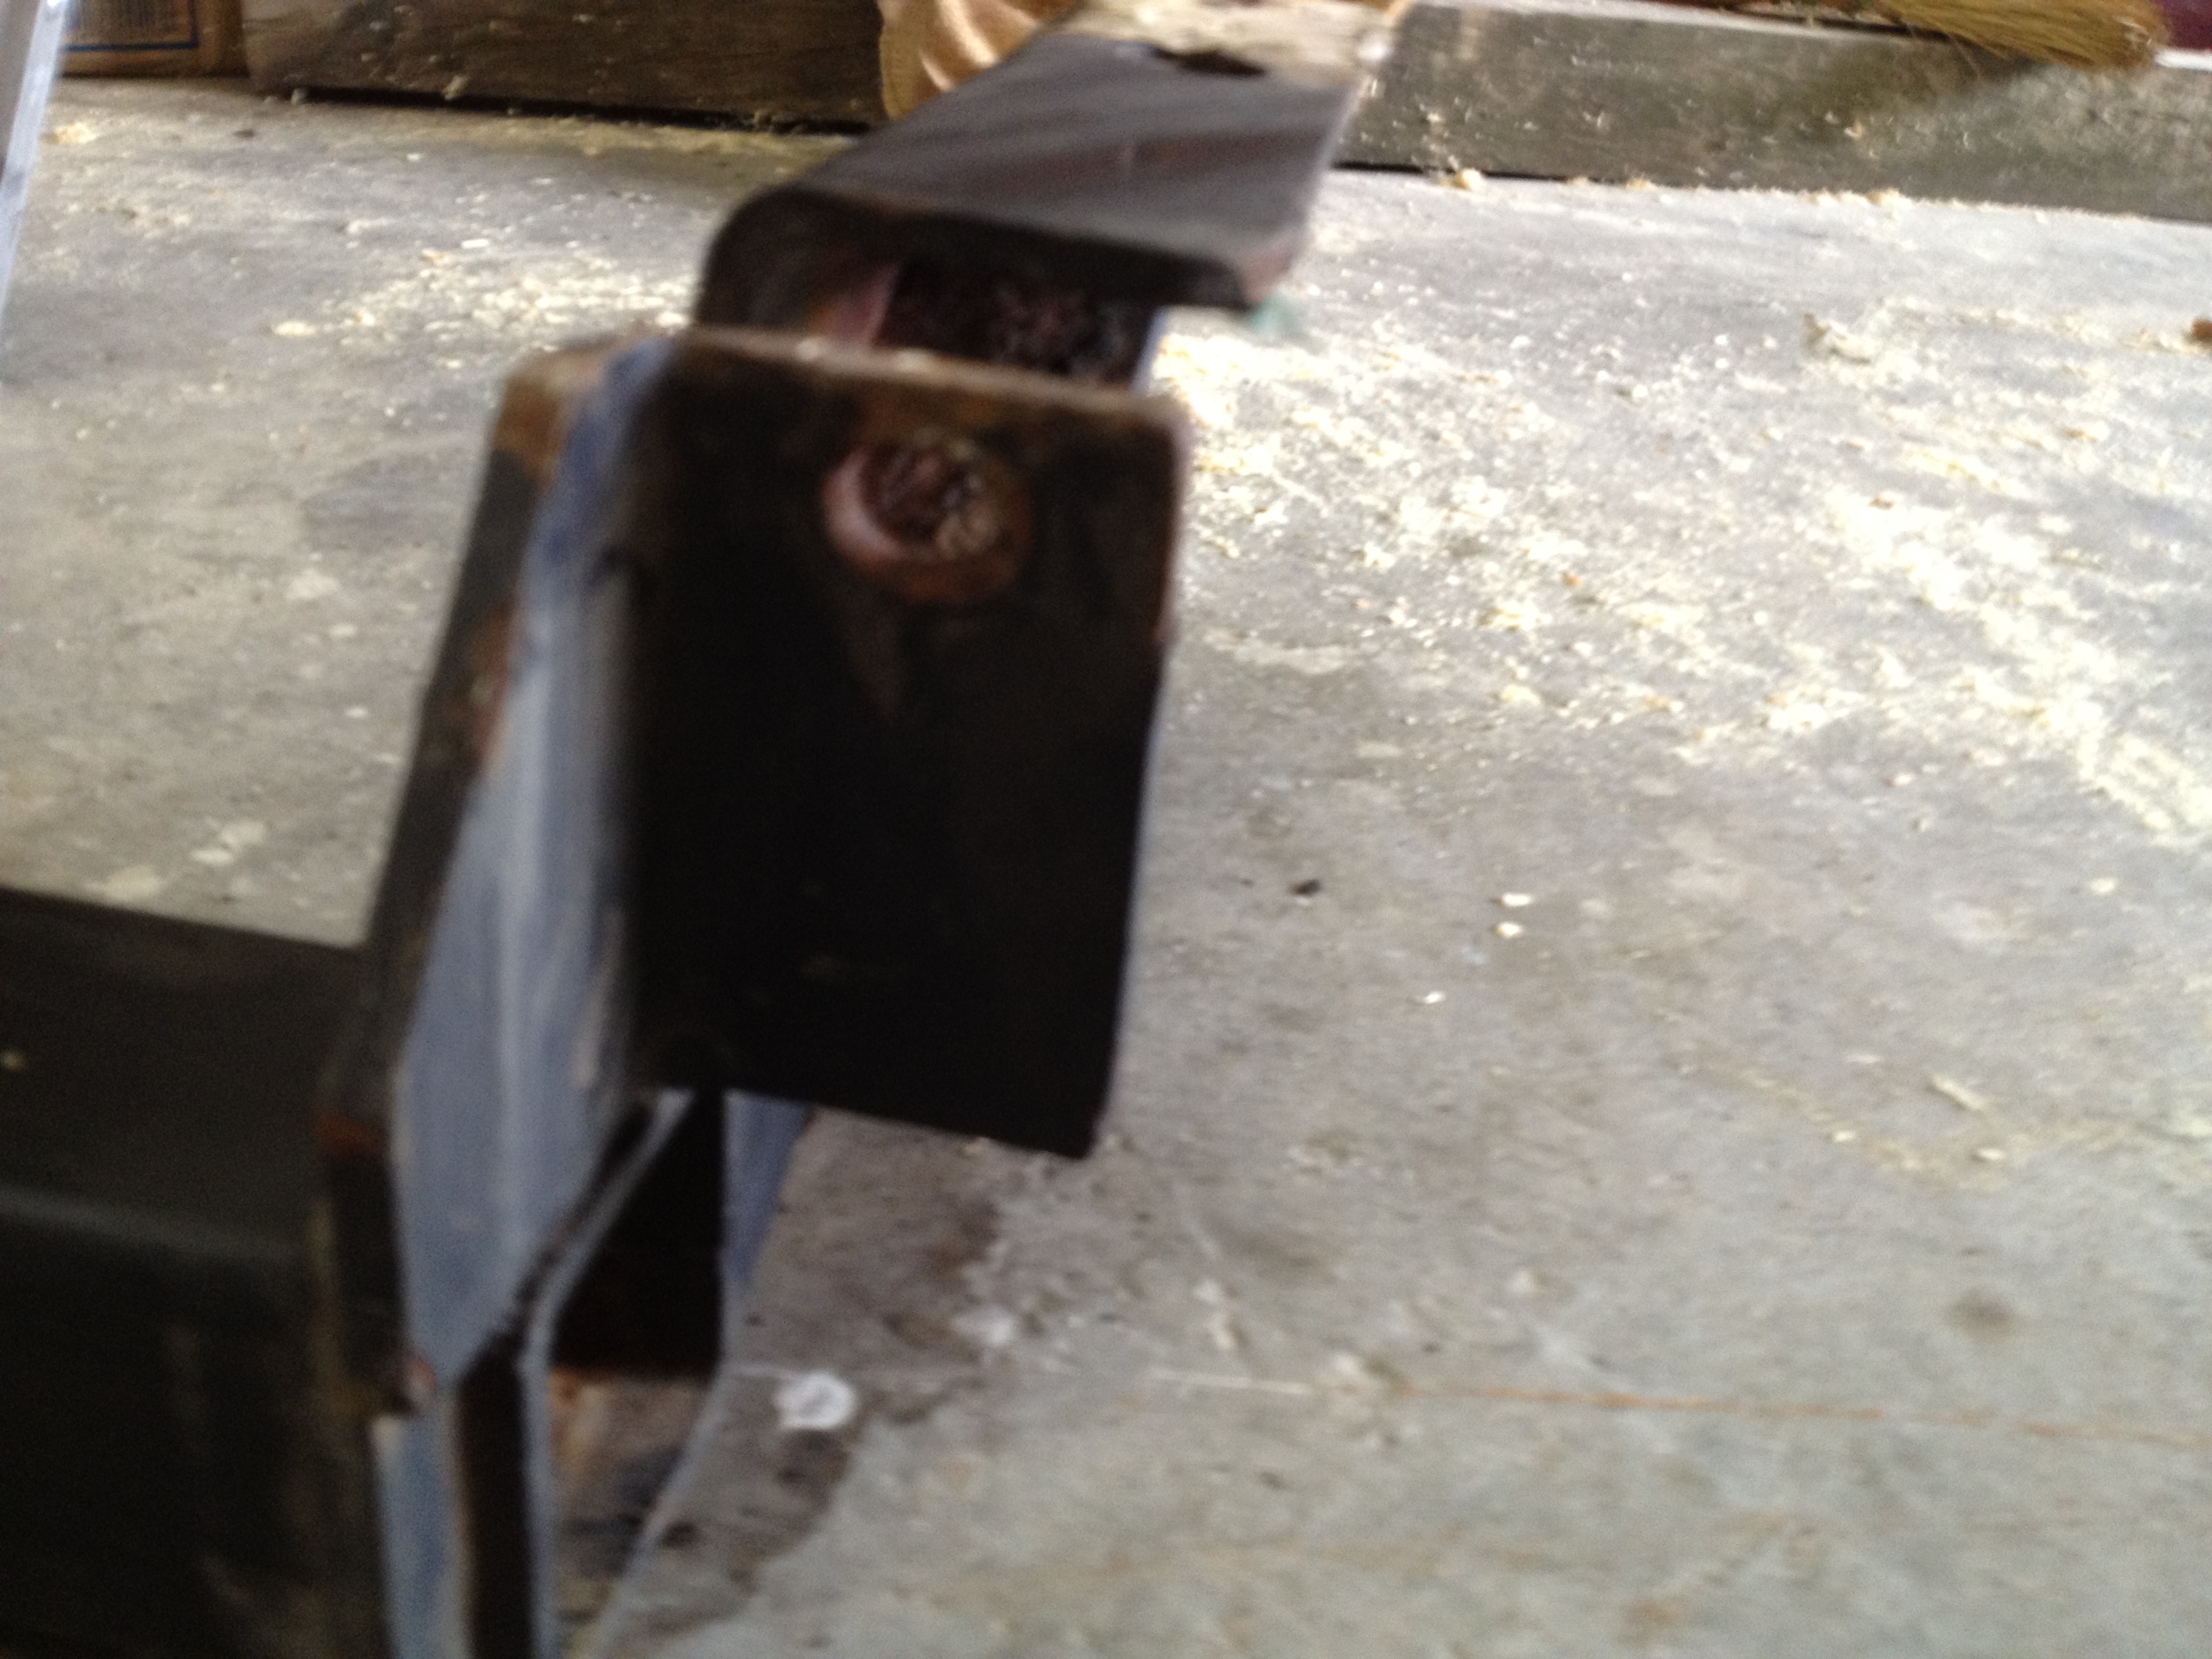
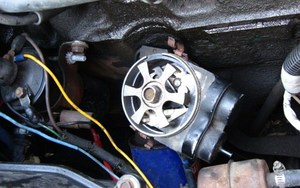
The strangest looking part of the whole system is the distributor. It has that odd-looking plastic vacuum unit on it. This unit is also a weak spot; the rubber diaphragm in it is thin and easily broken especially during an engine backfire.
While it may not be described in the manual, it is actually fairly easy to replace the vacuum advance module with the distributor in the car, and requires nothing more than a screwdriver, a 3/8 nut driver, and some sandpaper. If the unit has never been serviced then you may also need a pair of needle nose pliers and some patience.
;)
You begin by unplugging the control box, then remove the cap, rotor, and dust shield from the distributor body to expose the mechanism.
;)
Loosen the rubber grommet where the wires come through for the sensor and carefully work them out from around the spring on the advance unit so that they are free.
Using your nut driver, remove the small bolt holding the plastic advance to the distributor. Without trying to completely remove it, carefully loosen the advance unit minding both the sensor and the wiring. You may have to wiggle the reluctor wheel a bit or even turn the engine over slightly for alignment.

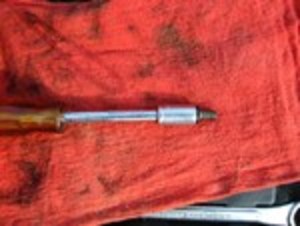
Once the unit is loose, position the screw holding the sensor to the advance unit where it is accessible. If you are unlucky it is a security bit and using your pliers and skill you will have to extract it then go find an exact match at the hardware store. If you are lucky it is a slotted screw and you can just carefully remove it with a magnetic screwdriver.
;)
The sensor is two small plastic parts and can now be carefully slid out of the groove on the vacuum advance unit and the whole piece carefully removed. Again be careful not to damage the wires.
Once the sensor is removed then the advance can be slid out. It may be difficult as you move over the spring pivot. You’re done. As the old manuals say, “installation is the reverse”.
;)
Before you install the parts check everything. Be sure the advance holds vacuum, everything is unbroken and the wiring not cut or nicked. Make sure both the retaining spring and the lever in the slot on the advance are there on the new unit.
If the old vacuum advance was difficult to remove a little bit of fine sandpaper on the slot it fits through can take the sharp edges and rough finish off and make installation easier. It doesn’t take much to make it slide right in, although it’s not a real precision fit as the vacuum advance can move left and right in the slot making lining up the retaining bolt difficult.
Once the vacuum unit is fitted, but before you attach it, it is time to fit the sensor. Slide it into the slot on the side and install the screw, remembering that it is in plastic and should not be too tight, just snug. Then back off the screw just a bit so you can move the sensor around.
Place the retaining spring on the sensor to hold it down and route the wires correctly around the spring pivot to the other side of the distributor. You may need to work with the spring and the wires to get them to not interfere with each other or the reluctor wheel.
;)
Now using the reluctor wheel and some patience, align the sensor so it will fit evenly in the gap of the reluctor, then snug down the screw. You may need a small screwdriver, a piece of welding rod, or a paperclip to find the hole for the attaching bolt and align the vacuum unit. Once aligned install the attaching bolt and put the remainder of the distributor together.
Test fire the engine and check the timing.
Now, for a little autopsy on the vacuum advance unit.
Deceivingly, the unit appears to have two diaphragms, but in reality there is only one. A lever rides between the pin from the vacuum diaphragm and a dummy pin on the opposite side. The length of this pin may determine the range of available advance with a longer pin granting more range.
I would be interested to see examples where the second diaphragm was used. During the 70s there were many strange modifications designed to control emissions, and many of those changed how vacuum advance was applied to the distributor. Generally they reduced or eliminated vacuum advance to ward off NOX emissions, while sometimes they applied manifold vacuum while cold or hot. The second dummy diaphragm may have just been a placeholder for future emissions use.
The plastic unit is in two parts held together by two rivets in the middle and is easily separated. You can see on this one from the discoloration where the diaphragm ruptured.
Beneath the diaphragm are a spring and a washer that control how quickly the vacuum advance occurs.
On the advance unit there is a slot in which the sensor rides, and this slot may also be a limiting factor as to the range of available advance. Vacuum advance is achieved by moving the sensor while rpm advance is achieved my moving the reluctor wheel, so the two are achieved independently.
 Ignition
 Selecting a new transfer case for your Jeep or Eagle can be a daunting task. You ask a dozen people and you’ll get six different opinions.
There’s not a lot of information out there, and some of it is biased toward selling you their product while the rest is focused on the rock crawling crowd. Most people will be looking at a New Process/New Venture transfer case as those have been the factory installs on Jeeps and Eagles for years, and they continue to be used by Jeep. (Other makers are discussed later.)
Your transfer case will have one or more of 4 basic modes: 2wd, 4wd High, 4wd Low, and neutral. The 4wd modes may be either part-time or full time, and there may be selections to choose between them. 2wd is always full-time when available.
Two-wheel drive mode on most Jeeps is rear axle only. The only exceptions are the Compass and Patriot that use a transaxle based drivetrain. Like Subarus they provide power to the front and use a computer to manage clutches and couplings to transfer power to the rear wheels when necessary. Therefore, these two models are beyond the scope of this article.
Many transfer cases provide both part-time and full-time selections. Part-time indicates that the mode may only be used on slippery surfaces. This means that the front and rear axles cannot move at different speeds and the vehicle is depending on one wheel sliding on the surface of the road to prevent breakage. Full-time selections provide a mechanism to allow the axles to move at different speeds.
The first decision you need to make is what you use the vehicle for. Is this a daily driver or is it towed to the trailhead? Be honest with yourself about where and when you drive it.
If you are only driving to the store and shuttling the kids around, then you may not need 4wd at all. In this case I would suggest an on-demand transfer case like the 147. There is nothing to shift, the front axle is automatically engaged when needed and all other times it’s a normal 2wd vehicle.
For the secondary vehicle/winter car there are several options, some with 2wd available and others with low range. In many cases you will not see a significant fuel economy or power difference between 2wd and full-time 4wd transfer case, and you have to remember to shift into 4wd when you may need it.
The most basic is the 119, a full-time four wheel drive transfer case which functions much like the 147 but always splits power between both axles. There are also the 128 and 129 transfer cases. The 129 is nearly identical to the 119 but it allows the selection of 2wd mode.
The 128 is similar again to the 119 and 129. It has 2wd, but it lacks any traction control, providing what is known as an open differential. It couples the front and rear axles together, but if one wheel completely loses traction there is very little power applied to the other wheels.
An open differential may be desirable in some circumstances. The 119 and 129 use a coupling filled with a special oil to keep both axles moving if a wheel on one completely loses traction but this part can wear out. Even without this coupling the 128 provides more traction on slippery surfaces than 2wd.
The 128 may be preferable on a vehicle that sees heavy use such as towing or heavy loading but is not used off-road. Of course both the 128 and 129 may be used in 2wd mode in the same way, but the 128 can be left in 4wd mode at all times without worry.
You may have the need for occasional off-road use. Perhaps you live at the end of a long or steep driveway, or you like to make trips out to the cabin. If so then you may be looking toward a transfer case with a low range.
Low-range 4wd will allow you to control your vehicle more easily at slow speeds and provide more power to the wheels. This can be especially useful with a manual transmission where it can help you avoid slipping the clutch.
The first three cases you may consider are the 219, 228, and 229. These are the same as the previously mentioned 119, 128, and 129 with the addition of 4wd Low. All three lock the front and rear axles together in low range, therefore they should not be driven on pavement when in this selection.
Also available are the 247 and 249OD. These cases both provide full-time 4wd and part-time 4wd low range. The 247 engages the front axle much the same as the 147, only when the back wheels slip. The 249OD is a little more aggressive, using a coupling similar to the 119 to connect the front wheels all the time.
It must be clear that the 249OD relies on the coupling to transfer power to the front wheels and has no differential. It has a heavier coupling unit to do this, but damage will leave you with either no power to the front axle or the front and rear axles nearly locked together.
In actual use they function much the same, and as long as they are maintained and not abused the couplings in the 147, 247, and 249 will last a very long time. The 249 may have some advantage in the rain and snow, but the clutches in the 147 and 247 are cheaper to replace and may provide better fuel economy.
If your vehicle is a primary driver and you’re looking for the greatest flexibility than the two choices are the 242 and the 249. It’s confusing that there are two transfer cases marked 249 and they are very similar, however they were not used in Jeeps at the same time.
The 249 (no OD) works in most ways just like the 219. It only differs in that its low range does not lock the axles together but the power continues to be controlled by the coupling. This has the advantage of allowing the use of low range at any time, but heavy use off road can damage the coupler due to overheating.
The 249 coupling is built heavier to withstand the continuous use, and even if it fails the vehicle is still drivable. It is a good compromise for a vehicle that only sees occasional off road use and is expected to be good in winter conditions or on loose surfaces. Having only two selections available means it’s easy to install and requires less driver input to work.
The other option, the 242, can be described as the jack-of-all-trades but master of none. It provides the most selections: neutral, 2wd, full-time 4wd, part-time 4wd, and low range part-time 4wd. It was also a popular factory option for Jeeps, making them easy to find.
Its main disadvantage is the differential is open so there is no traction control in 4wd full-time. Its advantages are that there are no couplings to wear out or break, that it can be driven in all weather conditions in 4wd full-time, and that it has both high range and low range 4wd for off road use.
The 242 is a good choice for a flexible use vehicle, a vehicle that will see frequent towing, and a vehicle that is expected to perform well off-road. If your Jeep is your only car and you like to go off road, this is the pick for you.
Many times the oil filled “Viscous Couplers” used in the transfer cases ending in “9” have been described as weak. In general use they appear to last well over 100,000 miles as long as proper maintenance and care is exercised. The oil level must be regularly checked as it also must cool the coupling, and any failure of the coupling will contaminate the lubricating oil. They are more sensitive to tire problems, and properly inflated tires of the same size and same wear must be used on all four wheels.
Transfer cases ending in “7” must also have extra care taken with them. Chrysler has recommended a special oil with friction modifiers to be used in them as the clutches controlling front axle engagement are bathed in the lubricating oil. They have the same issues with tires as the “xx9” transfer cases.
Regardless of the transfer case used, uneven tire wear or inflation adds extra stress on the transfer case and axles. Four wheel drive vehicles are much more sensitive to this than two wheel drive vehicles. Always make sure you replace all four wheels at once and use the same brand and size. Check tire inflation regularly.
Remember to check the fluid levels in your transfer case every time you change the oil. This is easily accomplished by removing the top plug and feeling the oil level with your finger. The oil is not just important for lubrication, but provides all the cooling for the gears and any traction control couplings in the transfer case.
Always use the proper fluid for your transfer case. Early vehicles specified motor oil, but AMC superseded that in the 1980s with a recommendation of Dextron II compatible automatic transmission fluid (ATF). Compatible ATF or Manual Transmission Fluid designed to replace ATF in manual transmissions will work properly in your transfer case with the exception of the “xx7” transfer cases.
Dextron II/III compatible fluids are inexpensive and widely available. Do not use Dextron VI in your transfer case. Do not fill the transfer case with gear oil or motor oil.
Transfer cases ending in “7” should use the fluid supplied by Mopar (Chrysler) labeled “NV245 - NV247 - NV249 transfer case lubricant” or Mobil 424 hydraulic fluid. Chrysler originally filled them with their special full synthetic ATF – ATF+4, and that may be used for top-up and emergency fill. You should drain out the ATF+4 and replace it with the correct fluid as soon as possible and never use Dextron (General Motors) fluids.
There are other transfer cases out there that are readily available for a Jeep or Eagle. These include the 207, 208, 231, 241 and 241OR. These are primarily off road transfer cases and only provide 2wd for on road use. They have all been extensively written about and discussed.
There are a handful of transfer cases not mentioned here that are common to find in Jeeps. They are either electrically controlled, or like the NV-245 electrically shifted.
Early Jeeps used transfer cases that provided four modes, neutral, 2wd, part-time 4wd high, and part-time 4wd low. These included the Data-Spicer 18 and 20.
From 1973 to 1979 Jeep offered the Quadra-Trac transfer case. It was a Borg-Warner supplied transfer case available that provided full-time 4wd and part-time 4wd and was available with or without a 4wd low range. It was only available with an automatic transmission, a Turbo-Hydromatic 400.
Quadra-Trac was only available on full-sized Jeeps at the time. It used a set of clutches, much like a common limited-slip rear axle, to keep both axles engaged.
Later Jeep CJs moved to the Dana 300 starting in 1980, and New Process transfer cases in all other vehicles. The Wrangler came with a New Process transfer case as did all Cherokees.
AMC Eagles, a melding between the Jeep and AMC’s small cars, initially came with a New Process 119, later a 129 with a 128 used for unknown reasons on some 1986 vehicles. Eagles have provisions to install the under-seat low range handle from a full-sized jeep although it was never offered.
New Process Gear became New Venture Gear in 1990 as part of a collaboration between Chrysler and General Motors. As of 2012 their future is in doubt.
Later transfer cases, those produced after the 1990 name change, follow a specific naming convention. In earlier transfer cases, the “strength” is not always discernible from the model number.
There are now aftermarket transfer cases available for the Jeep/Eagle platforms. They are all set up for serious off road use.
Sankar K. Mohan of New Venture Gear defined what the numbers on their T-cases mean, however these should NOT be considered definite. For instance the NV-245 is an electrically shifted transfer case with internal “GeroDisc” clutches and not a Torsen differential.
The first digit is the number of speed ranges:
1 – High range only.
2 – High range and low range.
The second digit is, on the later transfer cases, the relative strength.
The third digit designates the center differential:
1 – No center differential; part-time 4wd only.
2 – An open center differential; full-time 4wd.
3 – Electrically shifted.
5 – Torsen limited slip differential.
6 – Electrically controlled clutch.
7 – A hydraulically controlled clutch pack called “GeroDisc”.
9 – Viscous coupling; filled with a special Silicone oil that thickens with heat and pressure.
Ben M.
;)
Ben M.
The Jeep Service Bullitan on the 247 shudder.
Drivetrain Woking on classic cars you often have to re-discover lost tools and techniques.
When working on front drums manufacturers often swaged the hub and drum together as a unit, and while there are various reasons for this it makes seperating things just a bit painful for the rest of us who aren't expecting it.
What you need is a swage removal tool. Like the A1107T from this place that cuts the swedge off so the stud can be removed. It's one of those pieces that is below mention because everyone just had it, or the manufacturer meant for the whole thing to be a unit and never talked about seperating the hub from the drum.
;)
;)
;)
;)
;)
;)
;)